Readers like you help support Windows Mode. When you make a purchase using links on our site, we may earn an affiliate commission. All opinions remain my own.
![]() Want to design a home for free? Picture using Live Home 3D on your Windows PC to sketch floor plans, tweak interiors, and see your ideas in 3D without spending a dime.
Want to design a home for free? Picture using Live Home 3D on your Windows PC to sketch floor plans, tweak interiors, and see your ideas in 3D without spending a dime.
You will be able to download Live Home 3D on your Windows PC via the Microsoft Store for free, packed with tools to draw 2D plans and explore 3D designs.
It’s built by Belight Software, works on Windows 10 and 11, plus Mac and mobile, and has been shaping spaces since 2017.
As someone who loves planning renovations or just daydreaming about a perfect pad, you need a fun way to test ideas without a big investment.
This guide covers installing it on Windows, its key features, and tips to get started.
Share your coolest design below, or contact us for help.
How to Download & Install Live Home 3D on PC
To get Live Home 3D on your Windows PC, download it from the Microsoft Store. Here’s how:
- Microsoft Store
- Visit the page: Live Home 3D.
- Click Get (free) and sign in with your Microsoft account.
- Hit Install and wait for it to download (about 300 MB).
- Launch it and start designing.
Quick Tip: 💡 Save often to keep your dream home safe.

What is Live Home 3D About?
Live Home 3D, launched in 2017 by Belight Software, is a free home design app for Windows 10 and 11, plus other platforms. It lets you draw plans and see them in 3D, with updates adding more objects and samples.
Core Features: Create 2D plans, walk through 3D spaces, and tweak designs easily.
Why Use Live Home 3D on Windows?
It’s free, intuitive, and turns your PC into a design playground.
- 2D floor plan drawing
- 3D walkthroughs
- Sample rooms (kitchens, baths)
- Basic furniture and materials
- Export to JPEG (limited)
Try the pro version; Live Home 3D Pro
Quick Start Guide for Live Home 3D
New to Live Home 3D? Get going quick:
- Open the app and start a new project.
- Draw walls in the 2D view.
- Switch to 3D to see your space.
Best Settings for Live Home 3D on PC
Tweak these for a better experience:
- View: Adjust 3D quality in Preferences.
- Tools: Snap to grid in 2D settings.
- Objects: Browse samples in the Library.
Common Issues & Fixes for Live Home 3D
- 3D Won’t Load: Lower graphics in Preferences.
- App Crashes: Reinstall from the Store.
- Can’t Save: Check disk space or permissions.
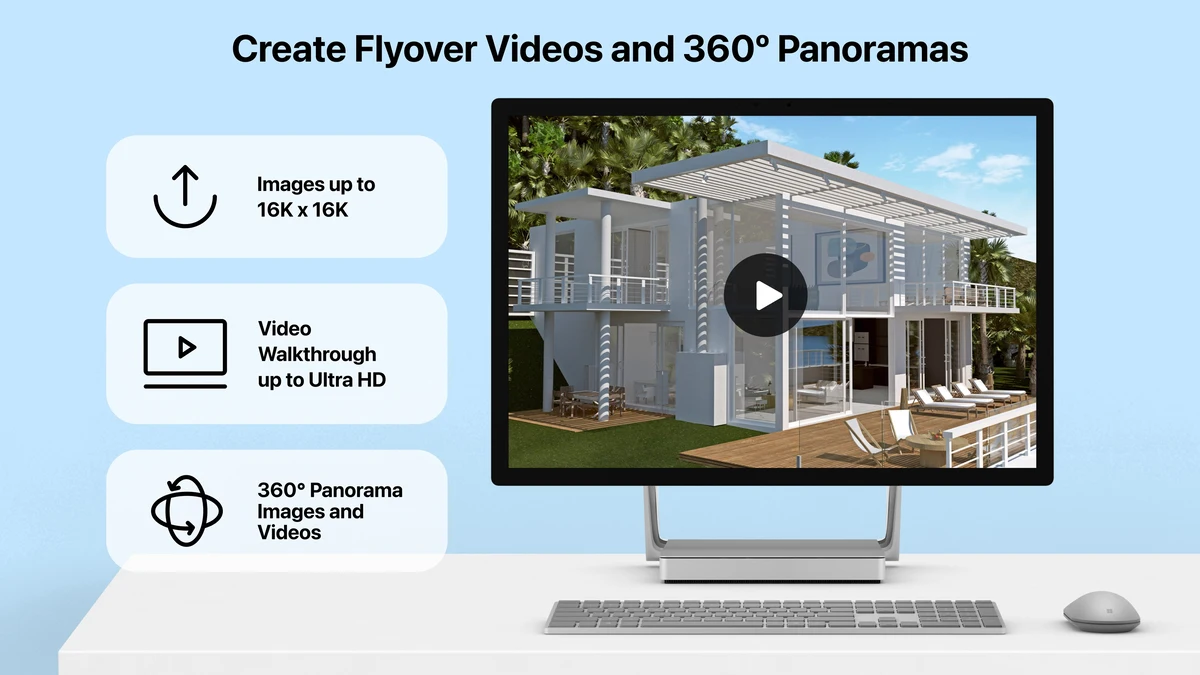
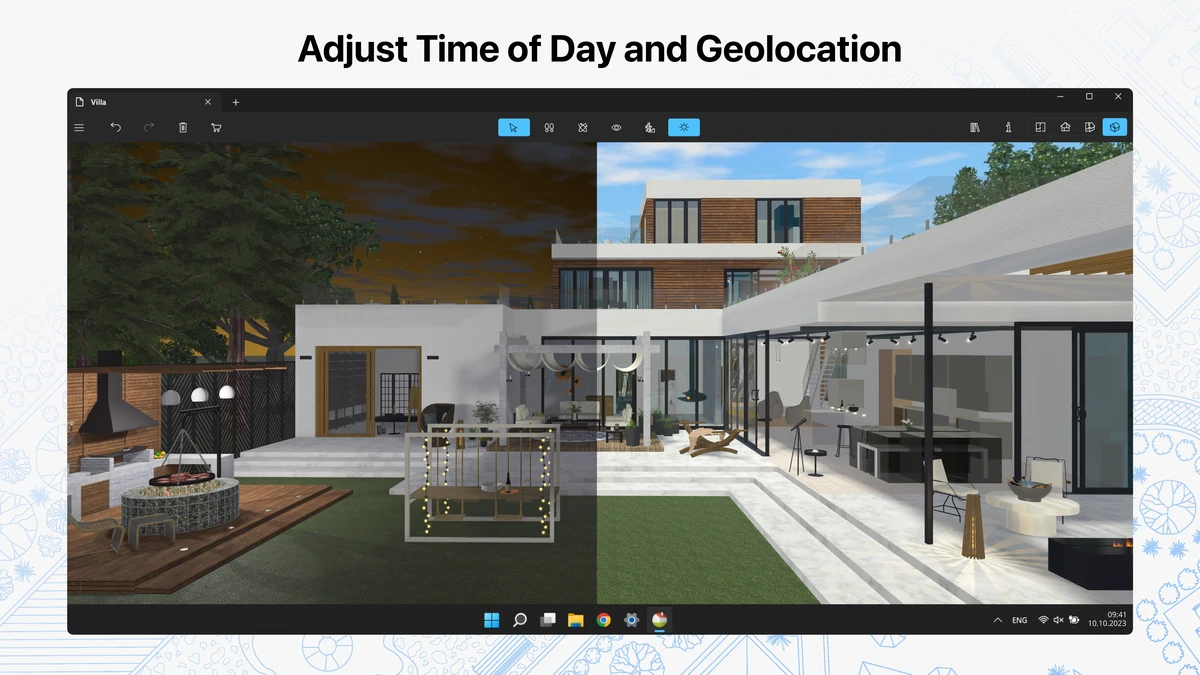
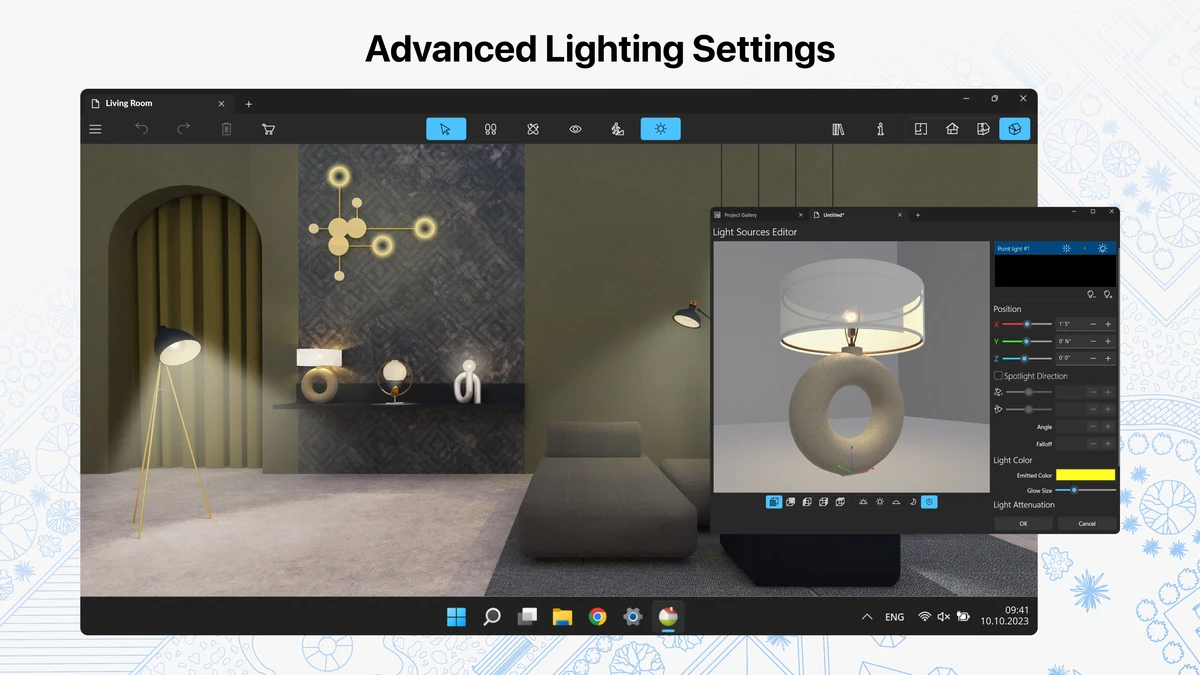
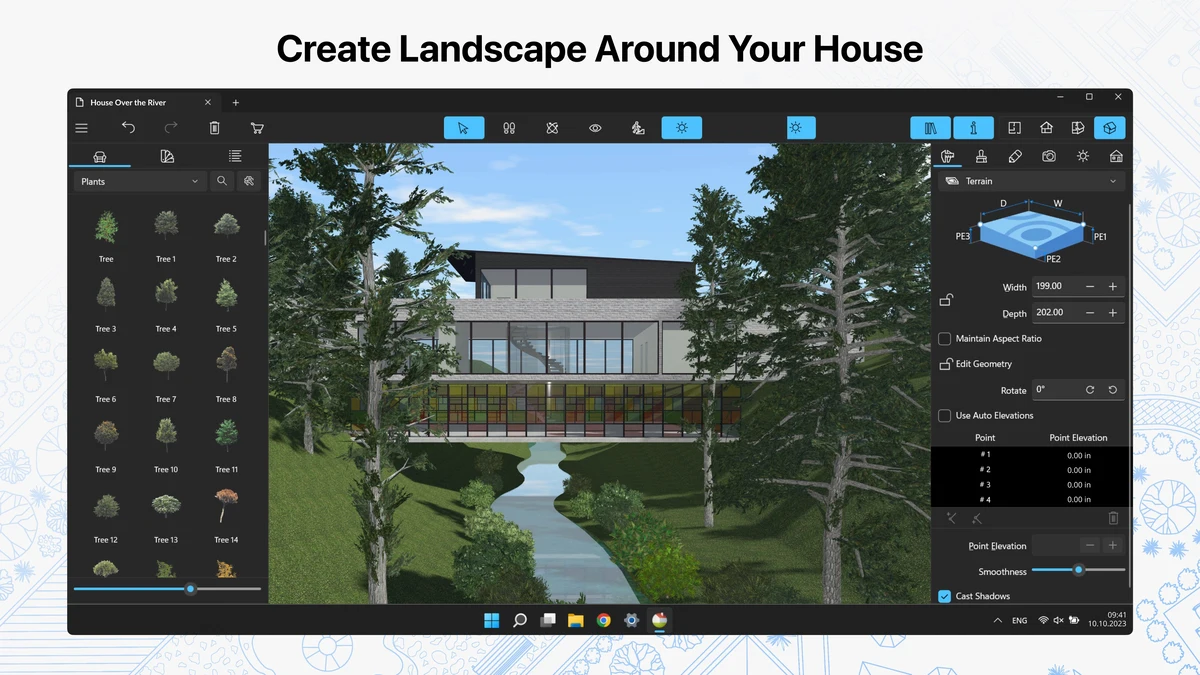
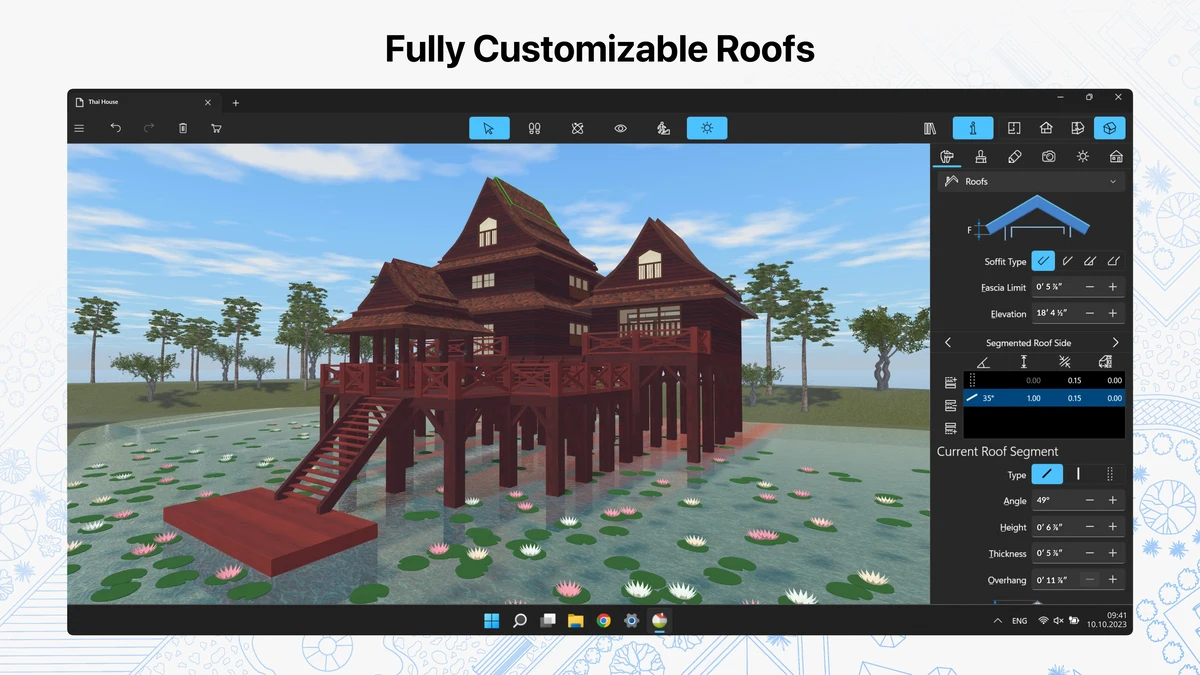
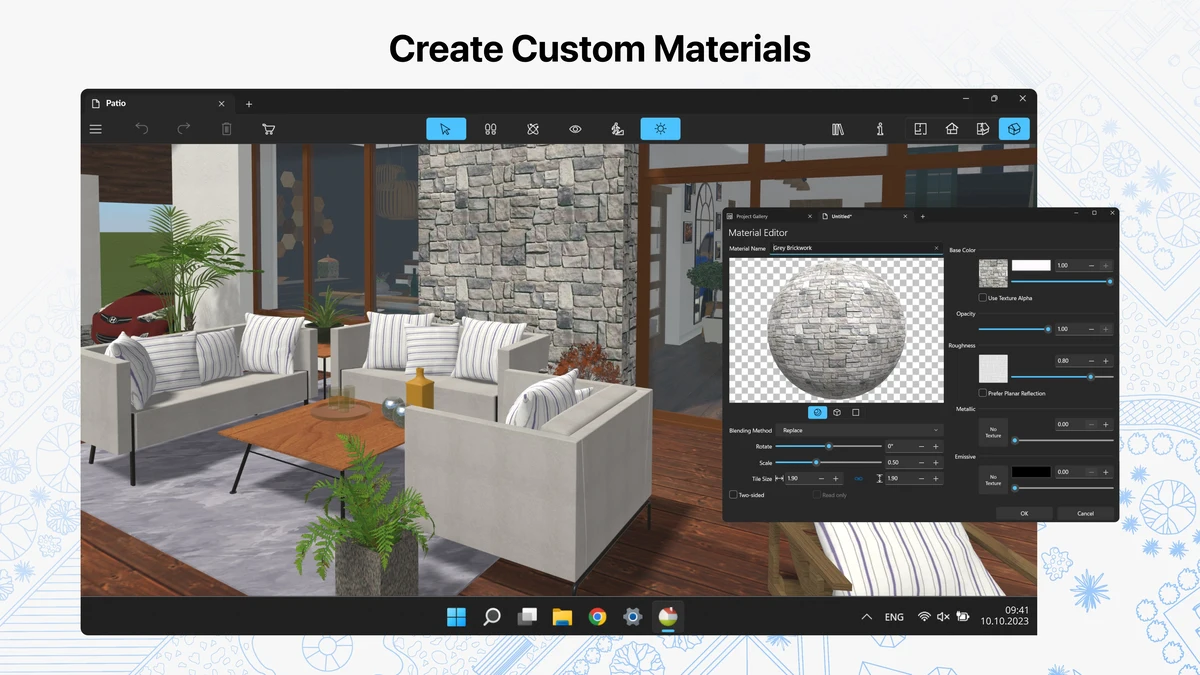
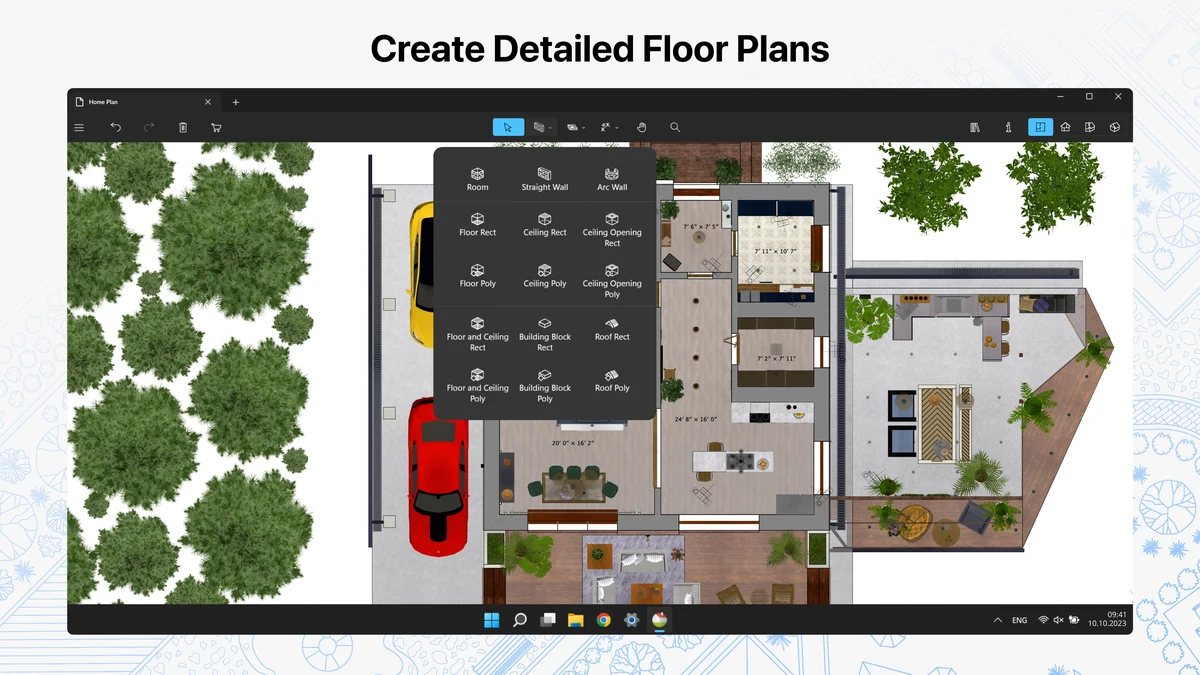
Live Home 3D Screenshots


Live Home 3D Beginner’s Video
Watch this quick guide to learn how to use Live Home 3D on your PC:
System Requirements for Live Home 3D on Windows
- OS: Windows 10 or 11 (64-bit)
- CPU: 1 GHz or faster
- RAM: 2 GB minimum
- Storage: 500 MB free
- Internet: Optional for updates
Live Home 3D on Windows FAQ
- Is it fully free? Yes, with Pro features as in-app buys.
- Can I export 3D models? Yes, but only with Pro upgrade.
- Does it need a graphics card? No, but it helps for 3D.
Support and Community
Explore More Windows Apps: Live Home 3D Pro, SketchBook Pro, Yoga Studio, Windows DVD Player
Discover more from Windows Mode
Subscribe to get the latest posts sent to your email.


🙂 Being using the pro version since it was released, worthit.